Task Management
MatterX Tasks enables firms to allocate matter specific tasks to users with due dates and estimated time allocation per activity.
Tasks can be attributed to a matter manually by adding one task line at a time or via matter templates with pre-determined stages and activities.
To view tasks
-
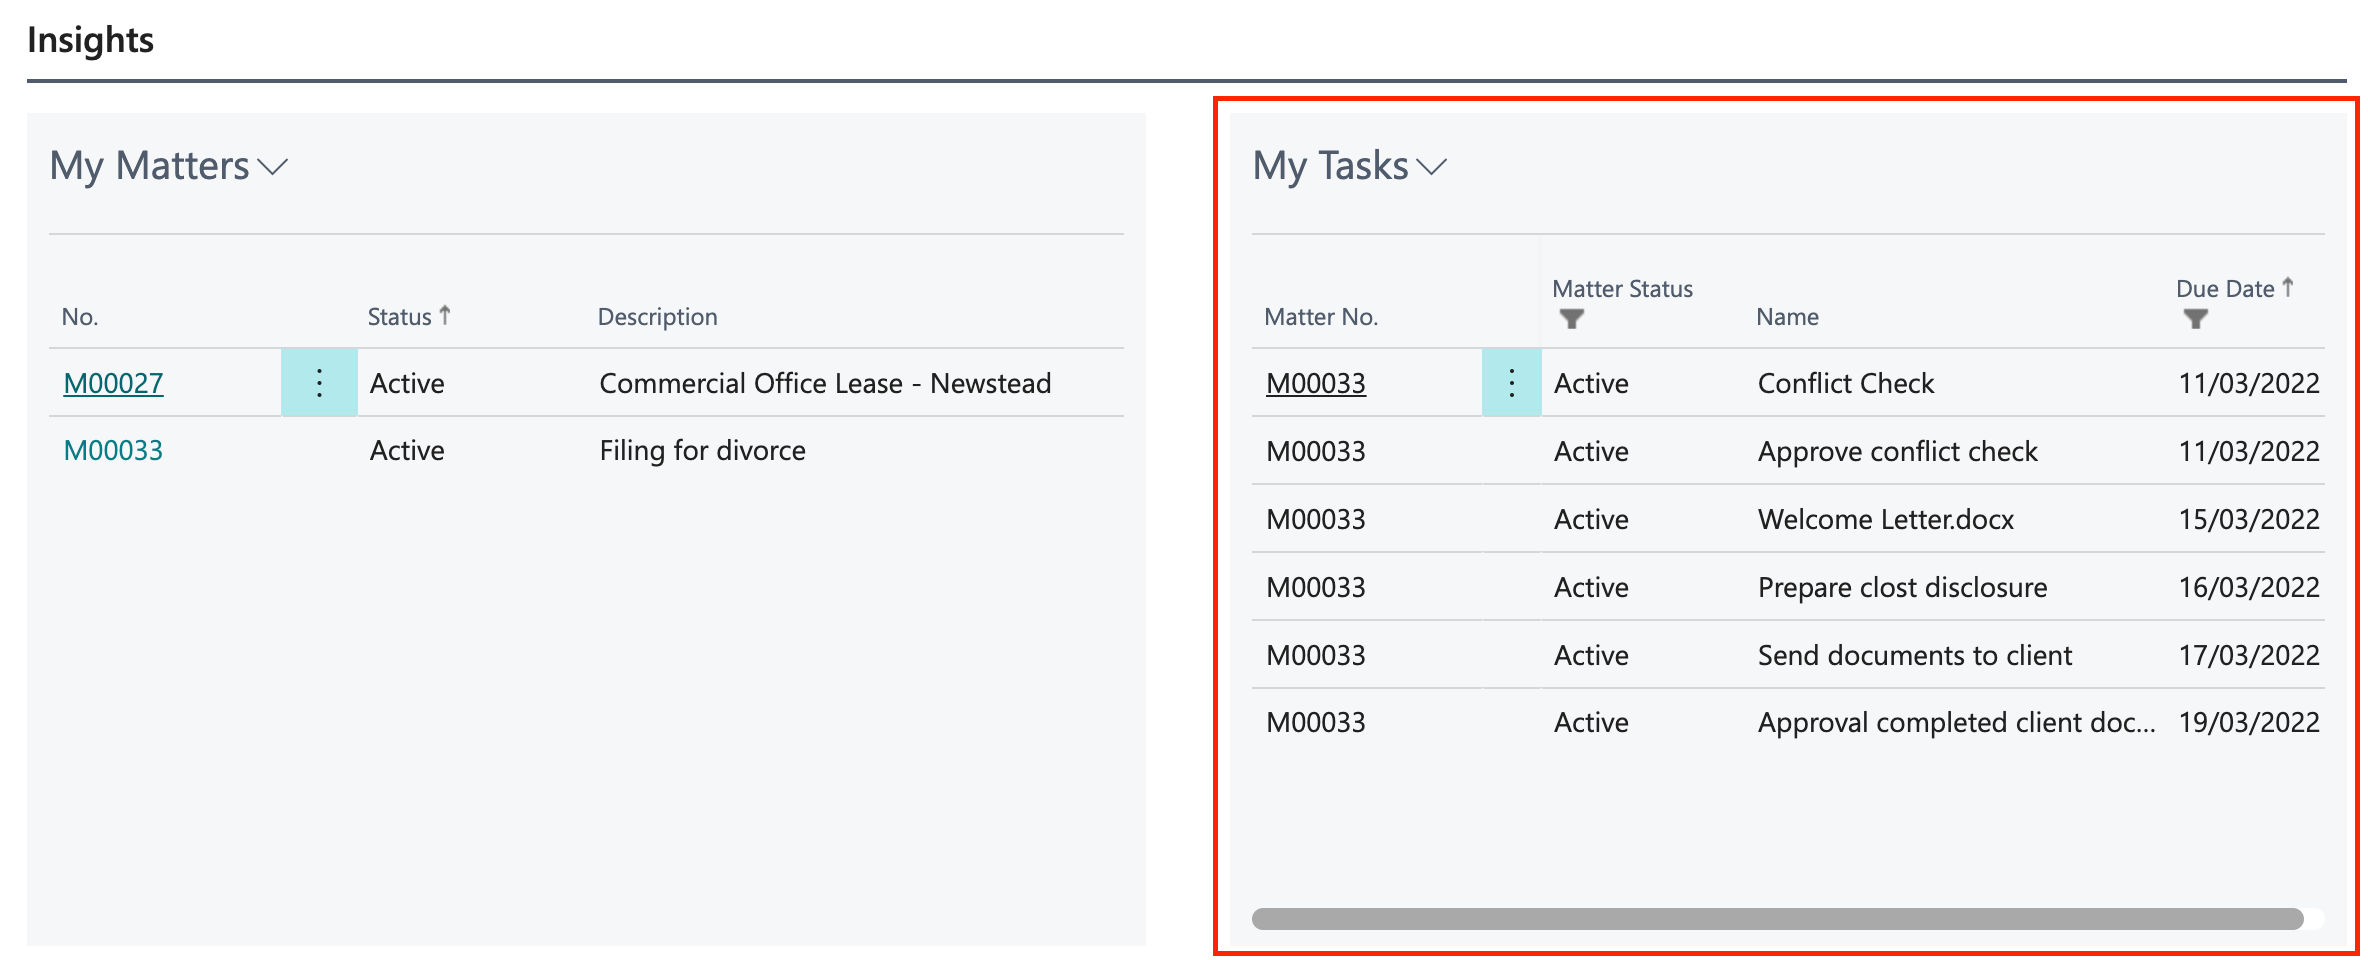
My Tasks are tasks that you are Responsible for completing across all your matters. These are displayed in a list format in your Role Centre.
-
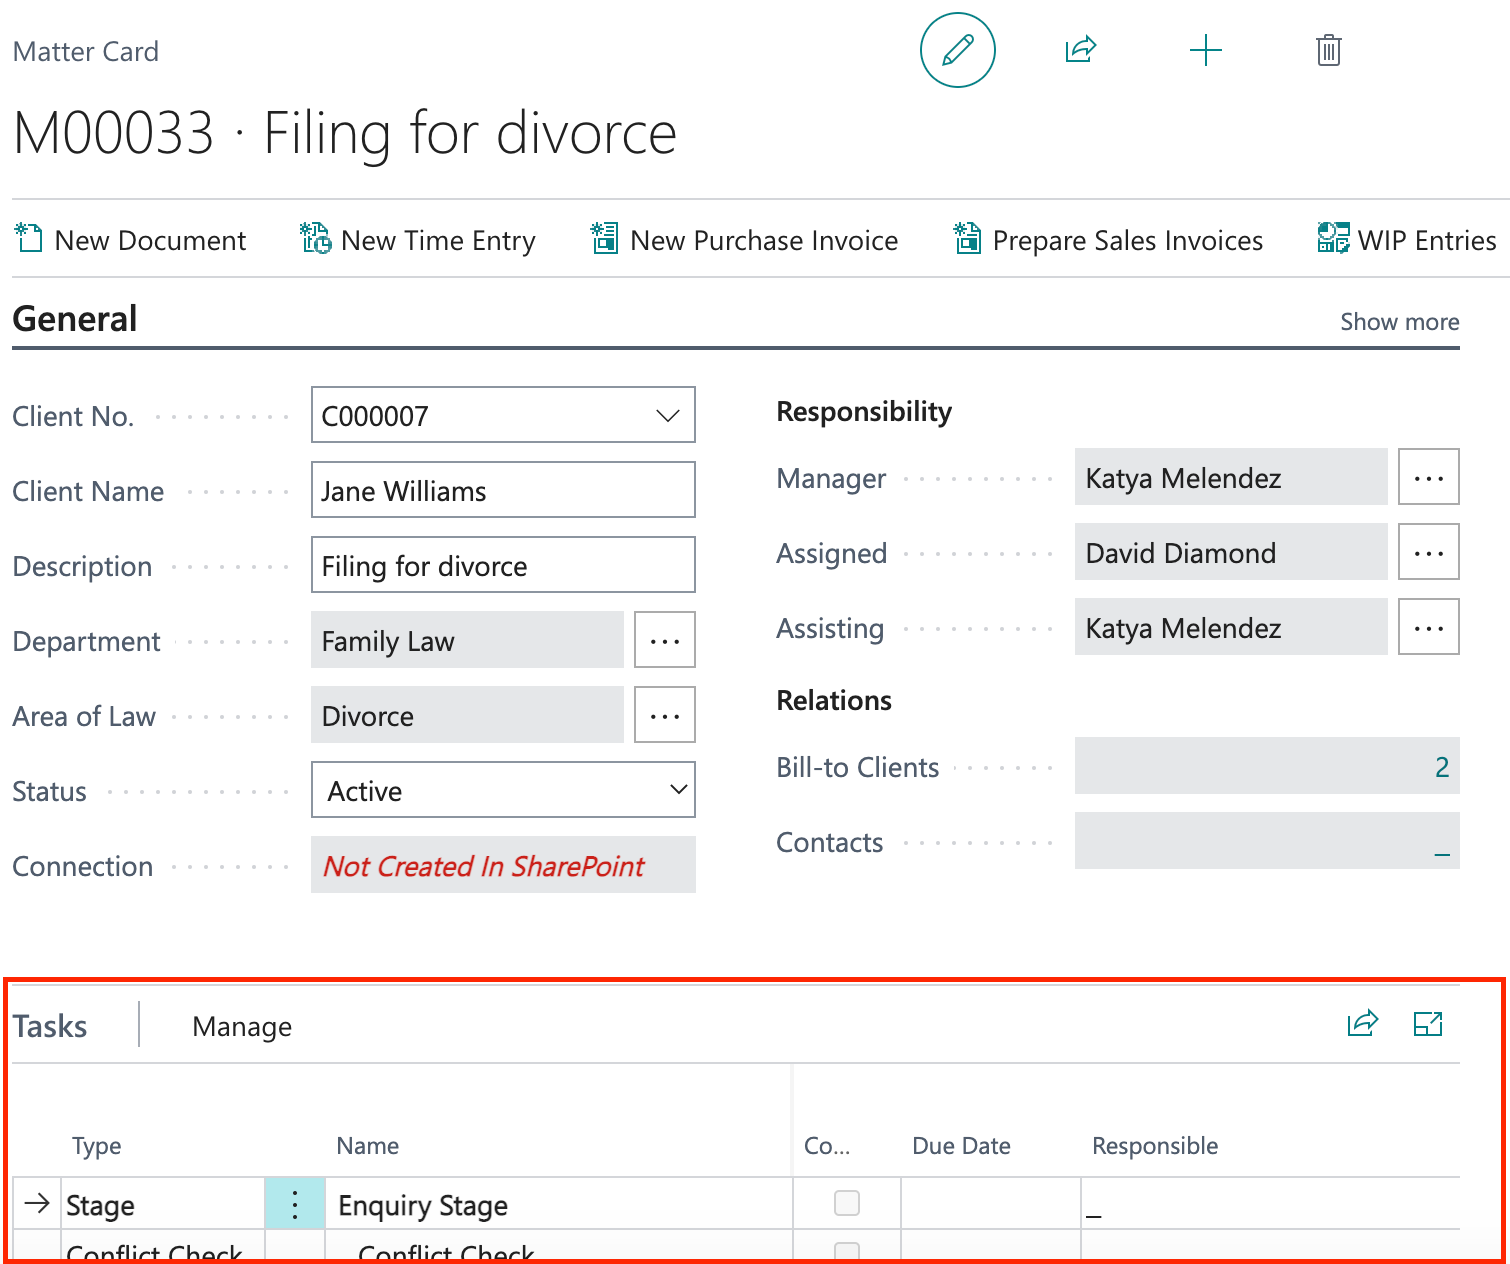
You can also view Tasks on specific Matter Cards. These tasks are displayed in Stages with tasks being assigned to various users.
-
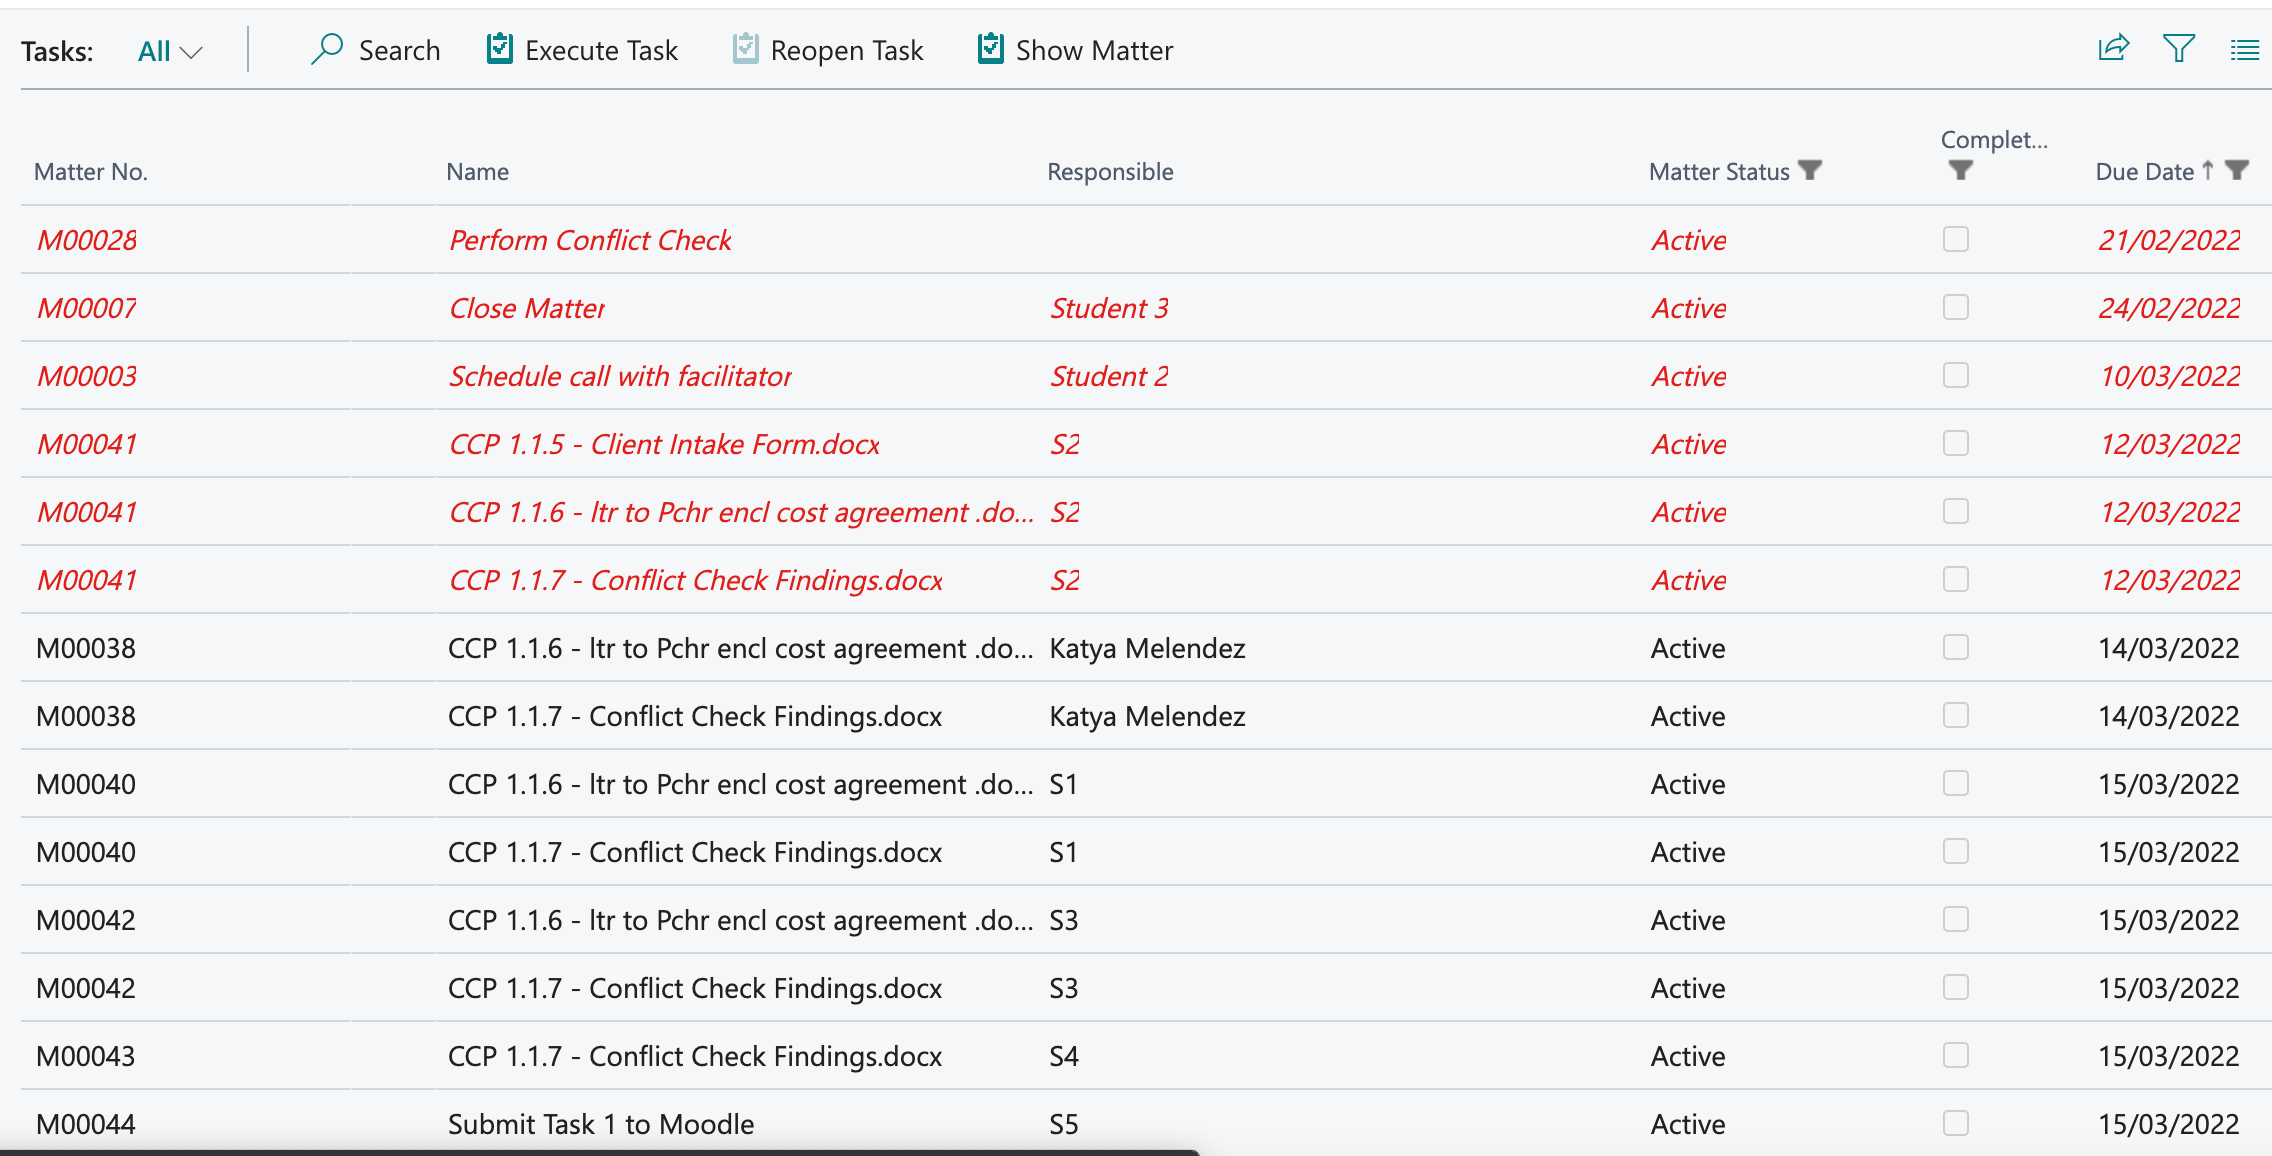
You can view All Tasks by selecting Tasks from the Quick List menu options at the top of your Role Centre.

- This list shows tasks across all matters that you have access to.
To allocate tasks via matter templates
To allocate a pre-determined list of tasks based on a particular type of matter, you must apply a Matter Template at the point of creating a new matter.
-
Select +Matter from the Actions menu options at the top of your Role Centre.

-
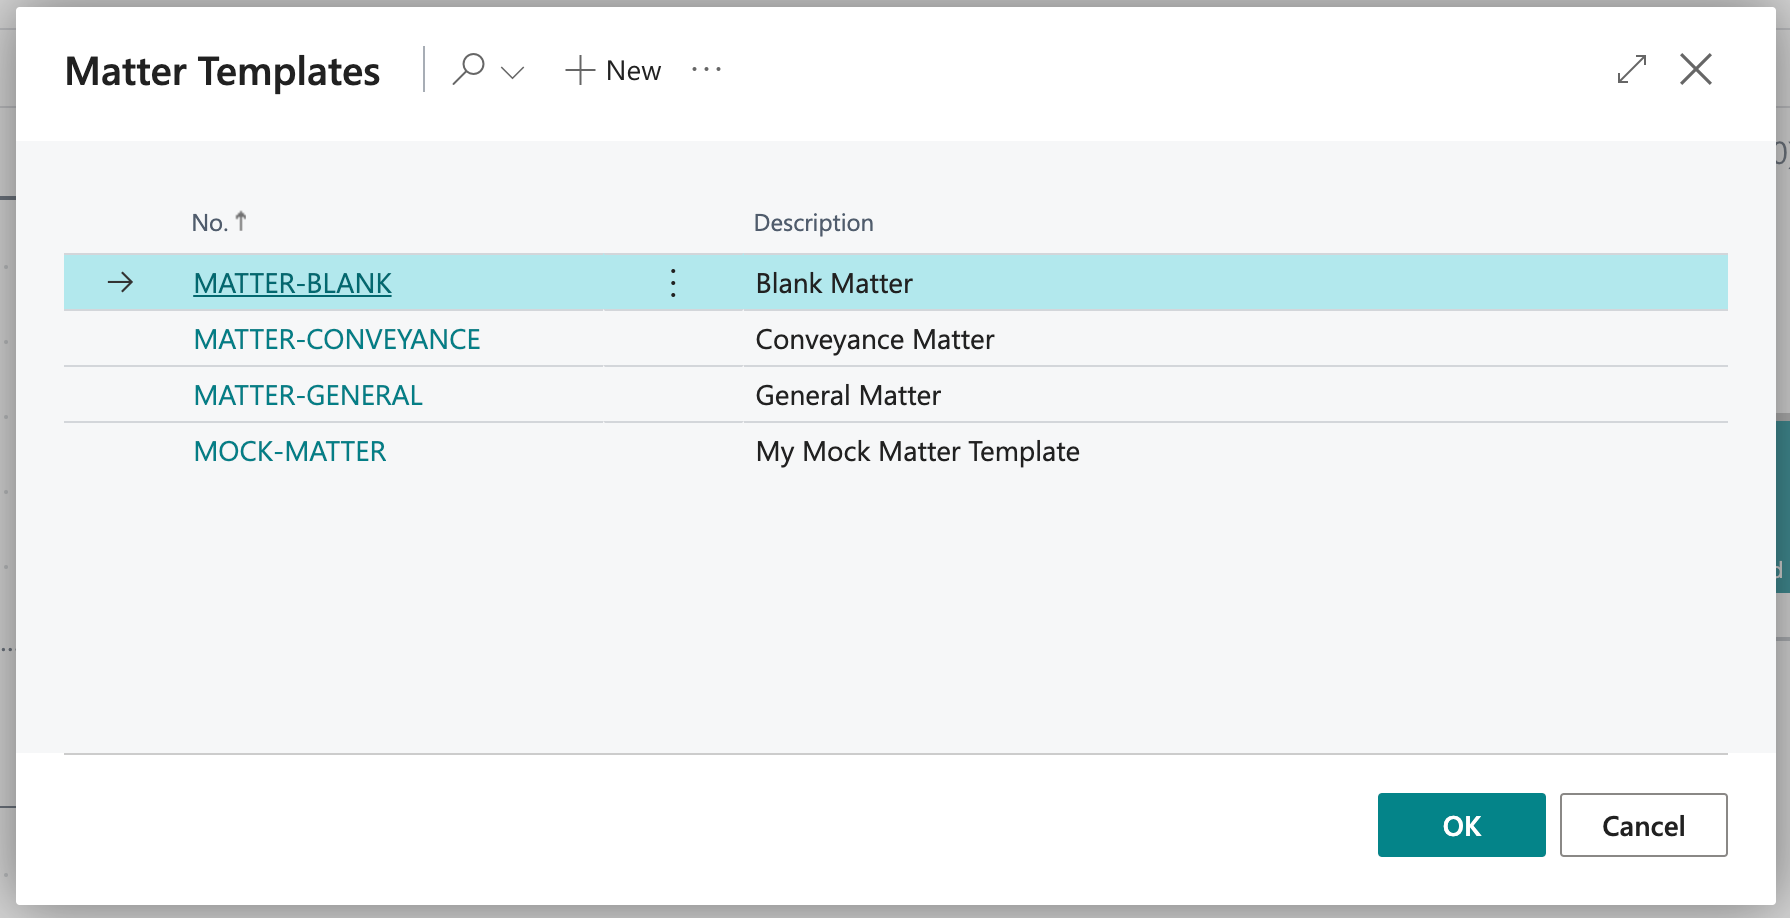
Select the corresponding template you wish to use. In this example, select Matter General from the matter templates window and click OK.
-
The Matter Card window will appear. Select Client No. to assign matter to a client and fill-out remaining matter card details.
-
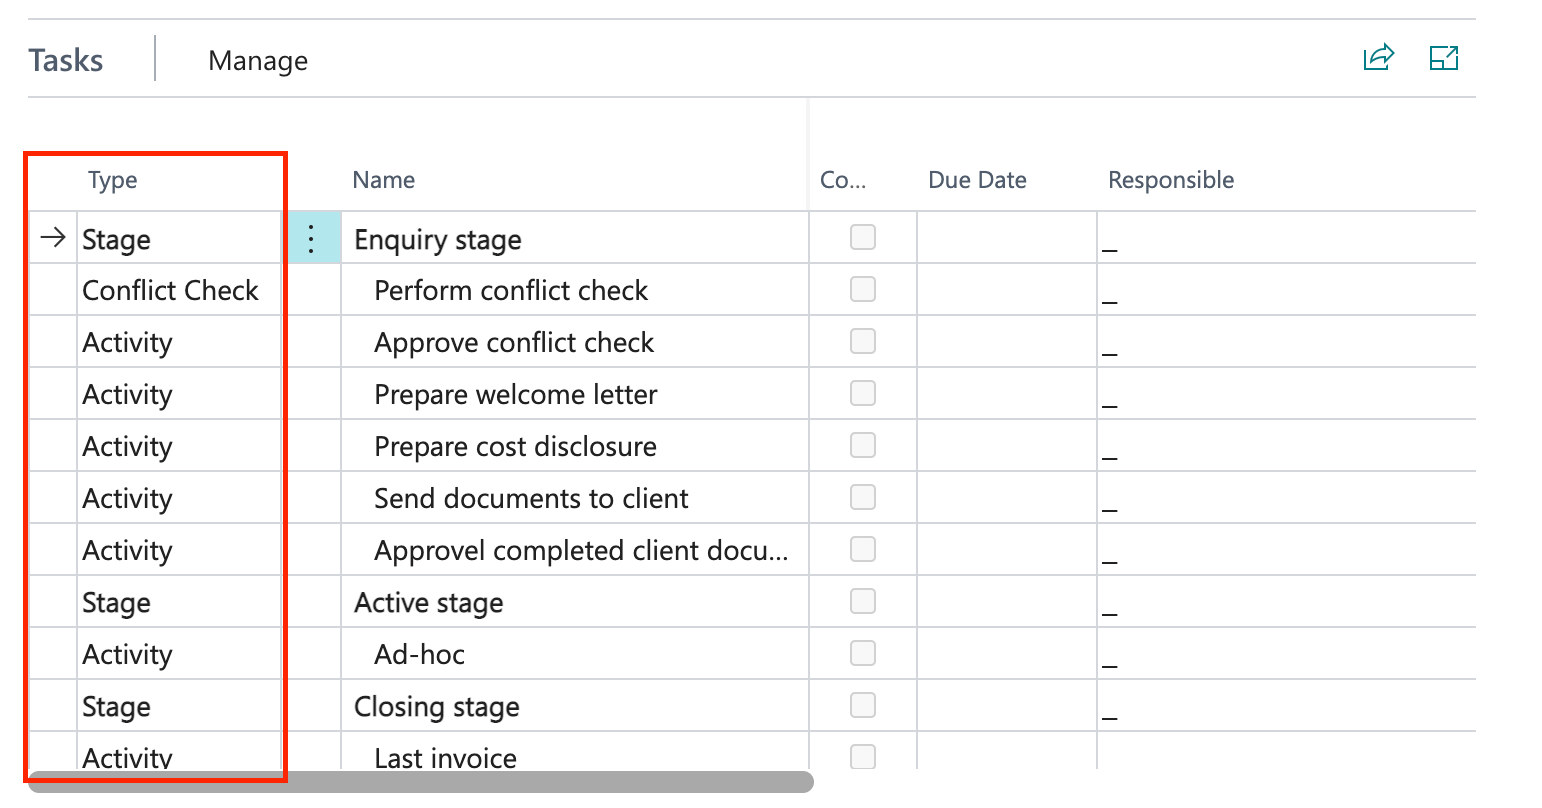
A pre-determined Tasks list will appear under the Tasks section of the matter card.
-
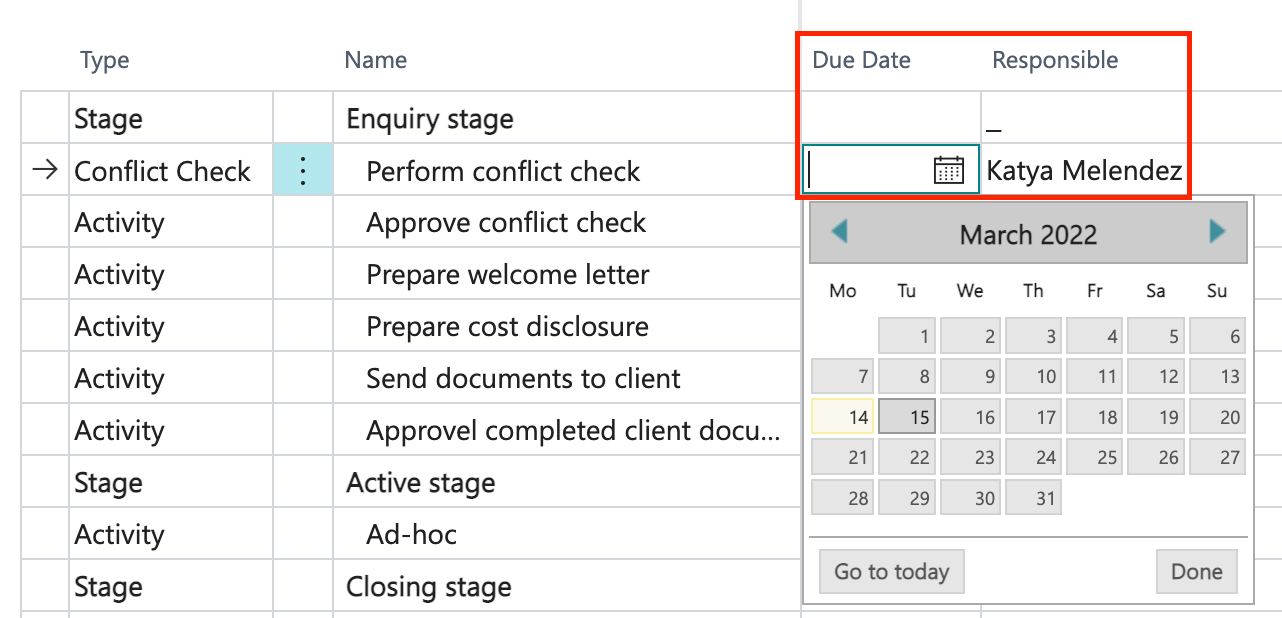
Allocate a Due Date and a Responsible user per task line.
To create tasks manually
To manually allocate individual stages and tasks on a matter, you must select a Blank Matter Template at the point of creating a new matter.
-
Select +Matter from the Actions menu options at the top of your Role Centre.

-
Select Matter Blank from the matter templates window and click OK.

-
The Matter Card window will appear. Select Client No. to assign matter to a client and fill-out remaining matter card details.
-
Create a new stage by selecting Stage from the Type column in the tasks table. Then enter the Stage's Name in the Name column in the tasks table.

-
Add additional task lines with corresponding Due Dates and user Responsible for completion of the task.

To execute a task
There are two ways to execute a task:
-
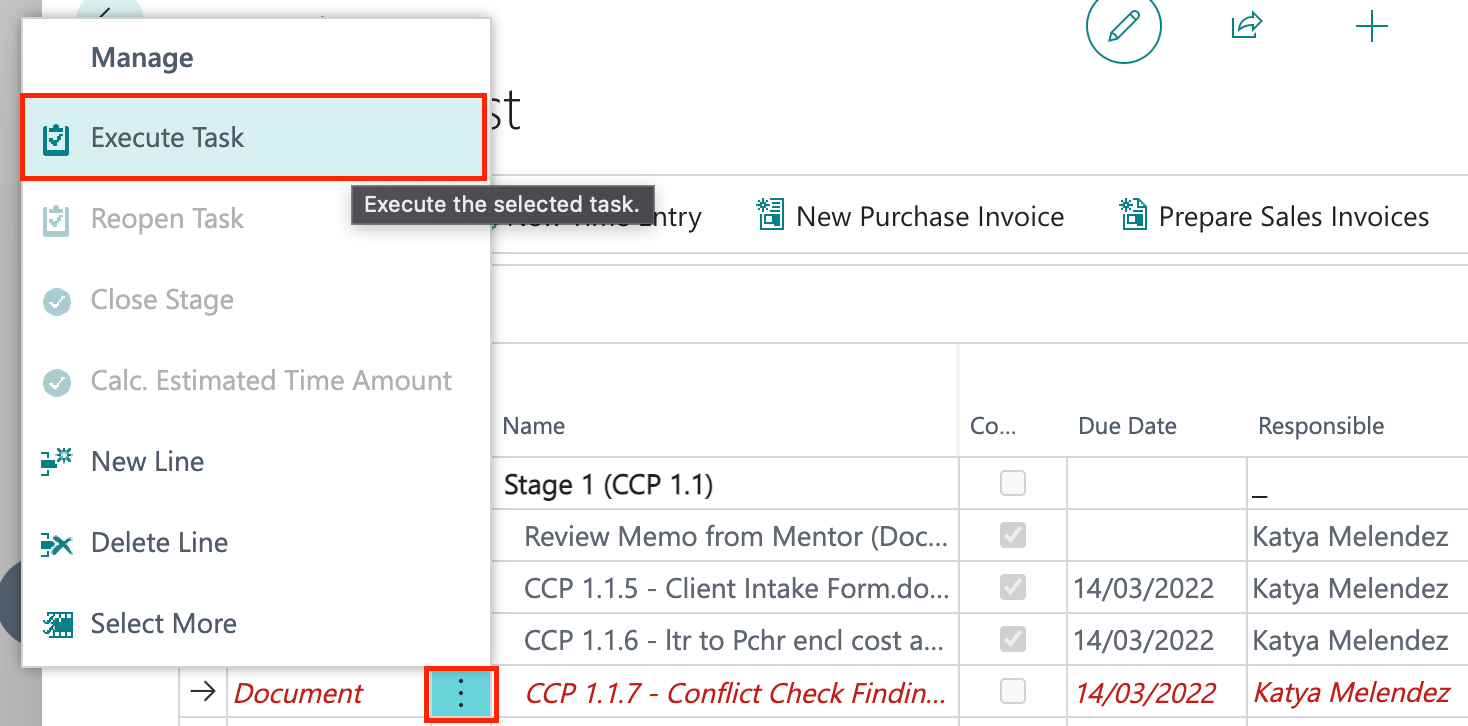
Click the three vertical dots next to the task Type and then select Execute Task.
-
Select the Manage action at the top of the Tasks section and then select Execute Task.

To execute a conflict check task
-
Click the three vertical dots next to the task Type and then select Execute Task.

-
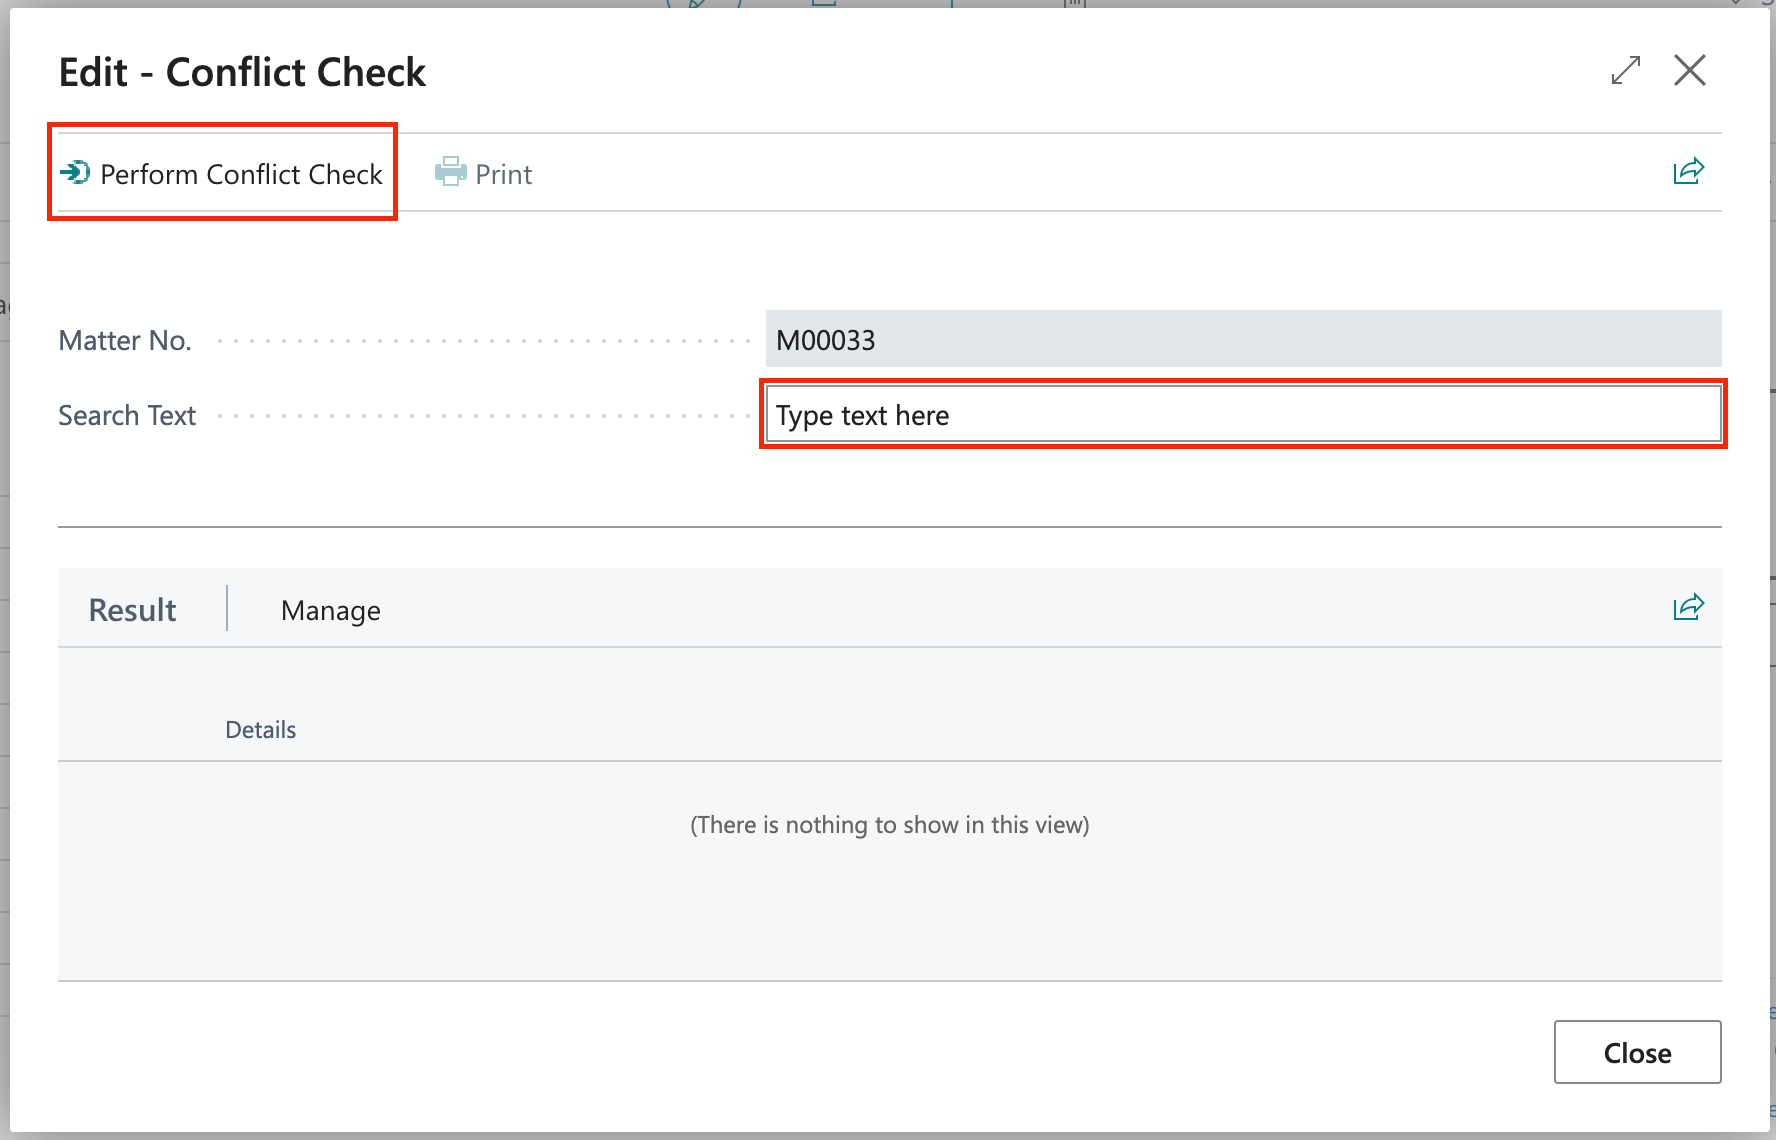
Type in the text you wish to search for in the Search Text box within the Conflict Check window. Select Complete Conflict Check.
-
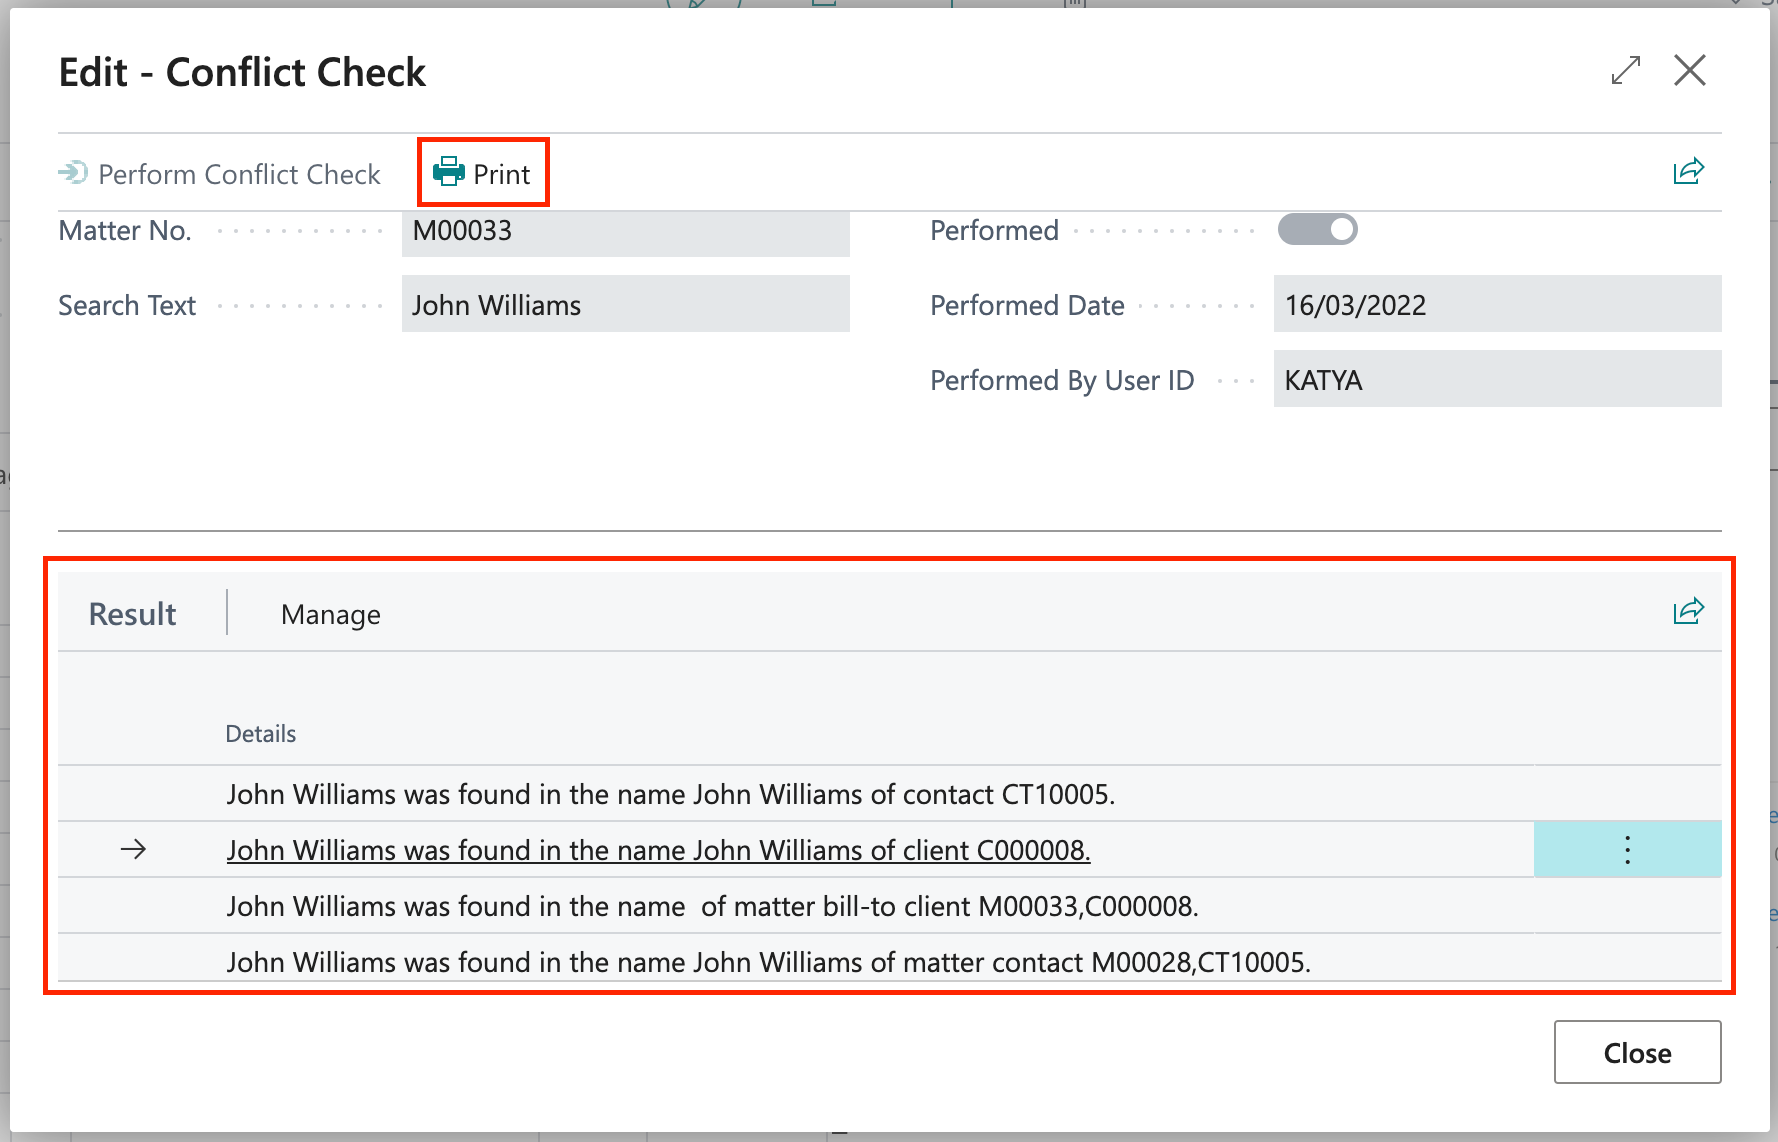
Search results will appear. Select Print to create a Conflict Check report.
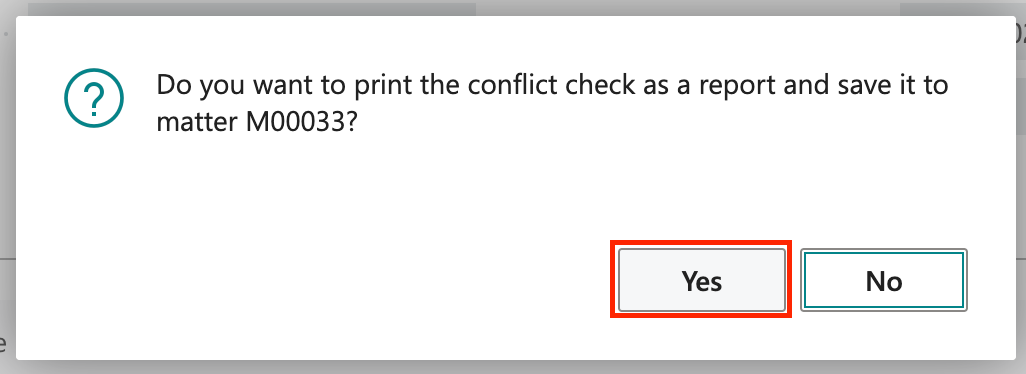
- You will be given the option to print the Conflict Check as a report and save it to the matter. Select Yes.
-
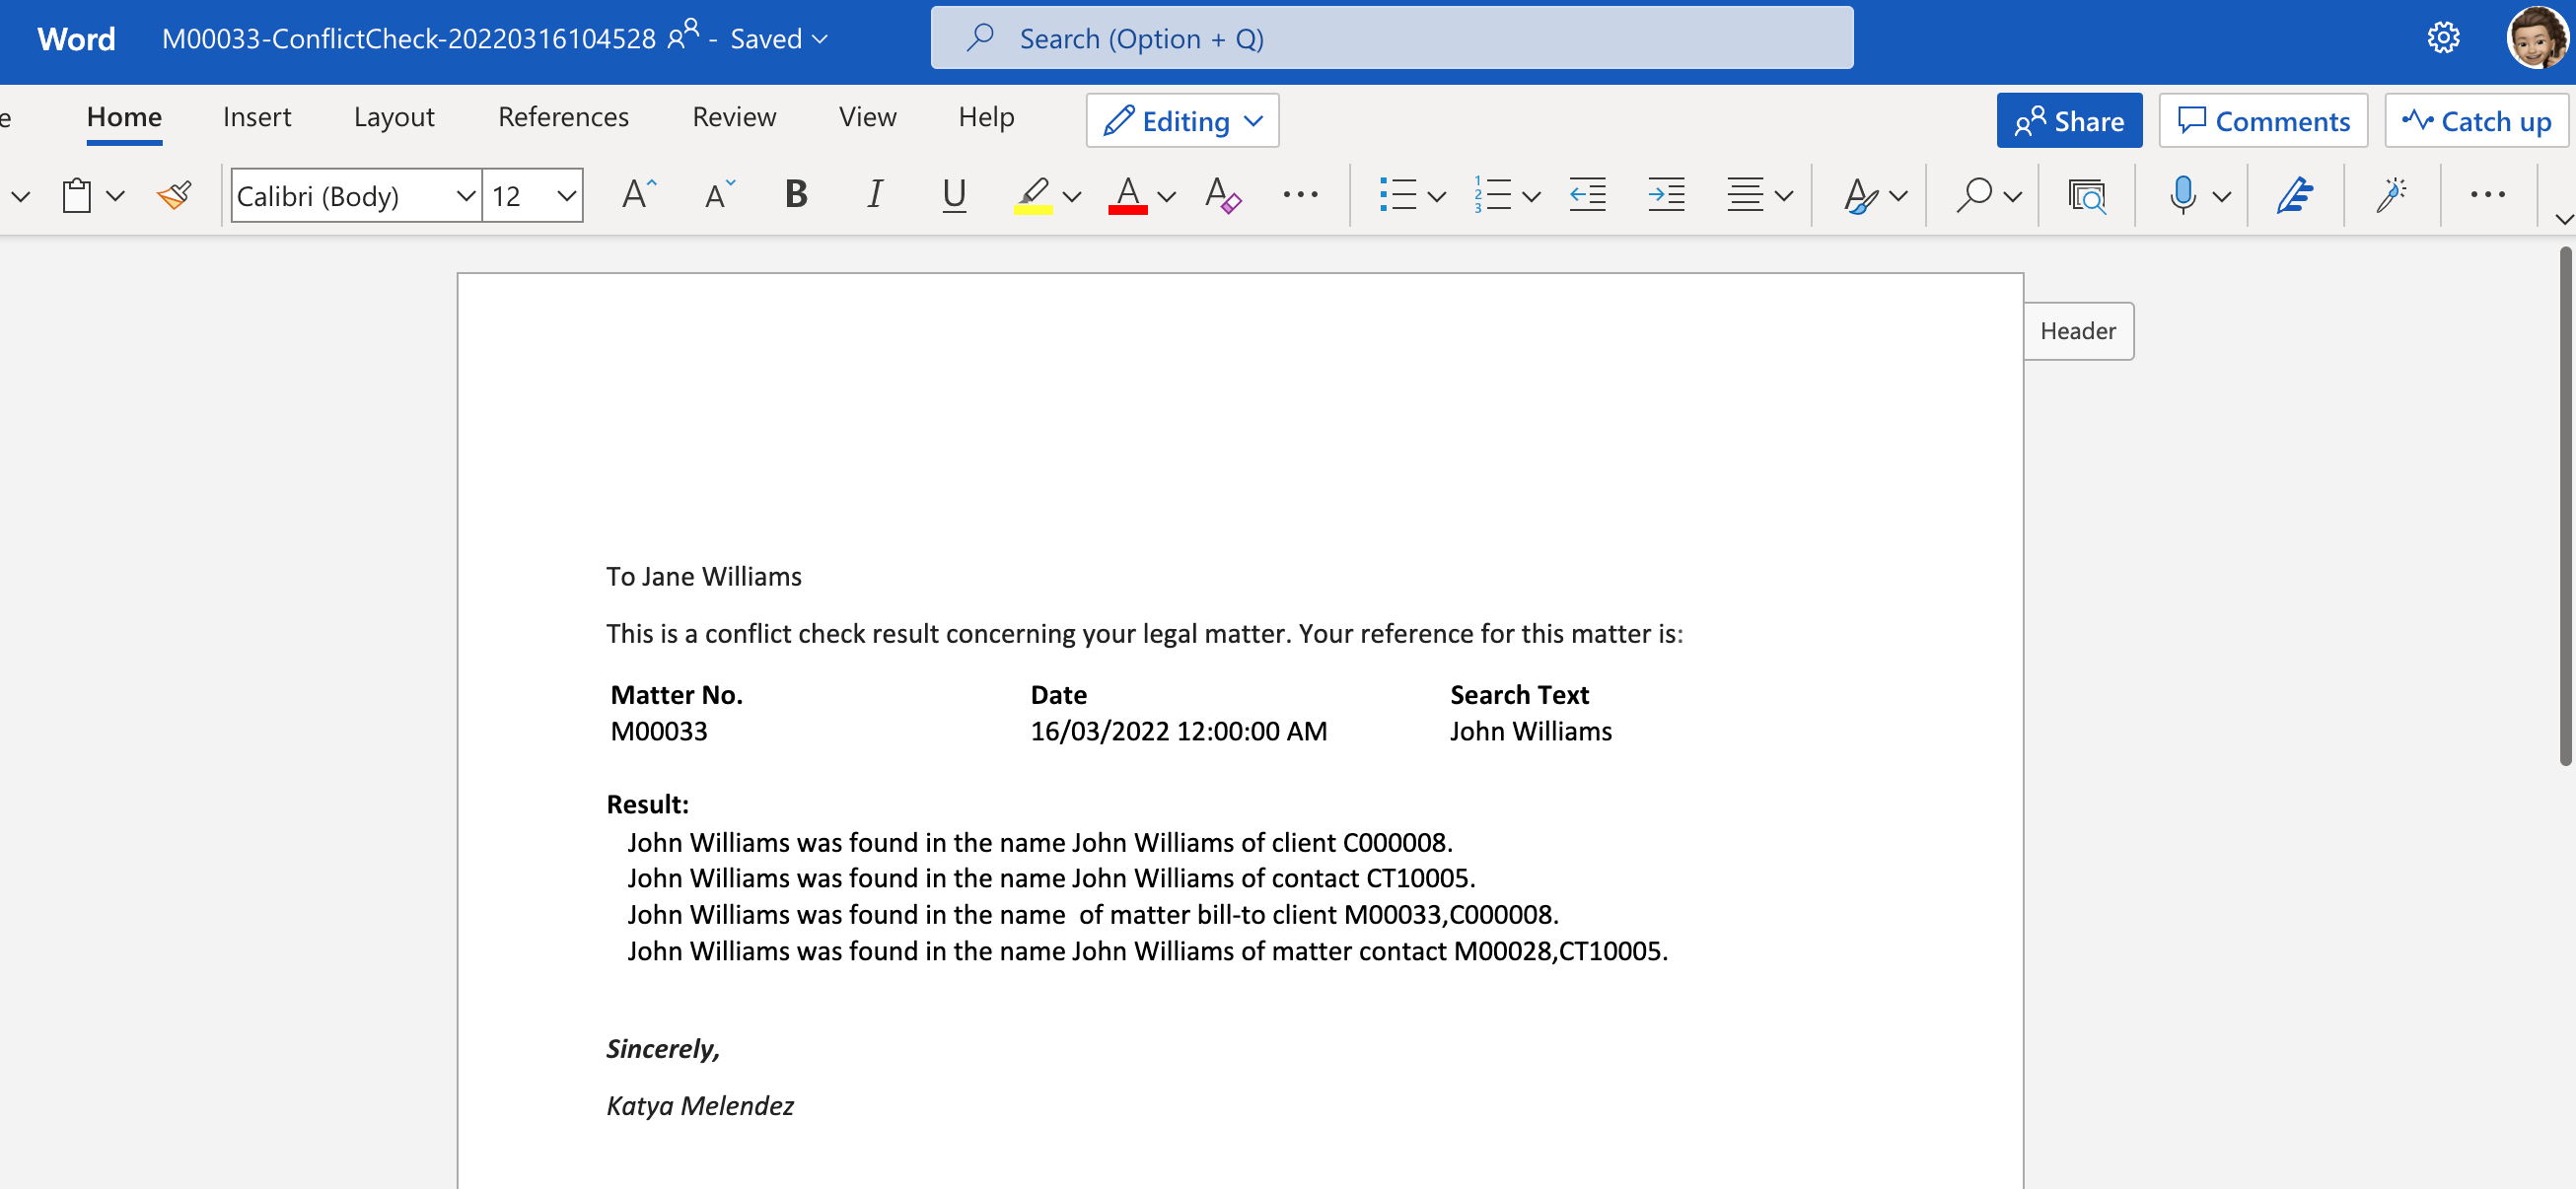
Word will open and display your Conflict Check Report document.
-
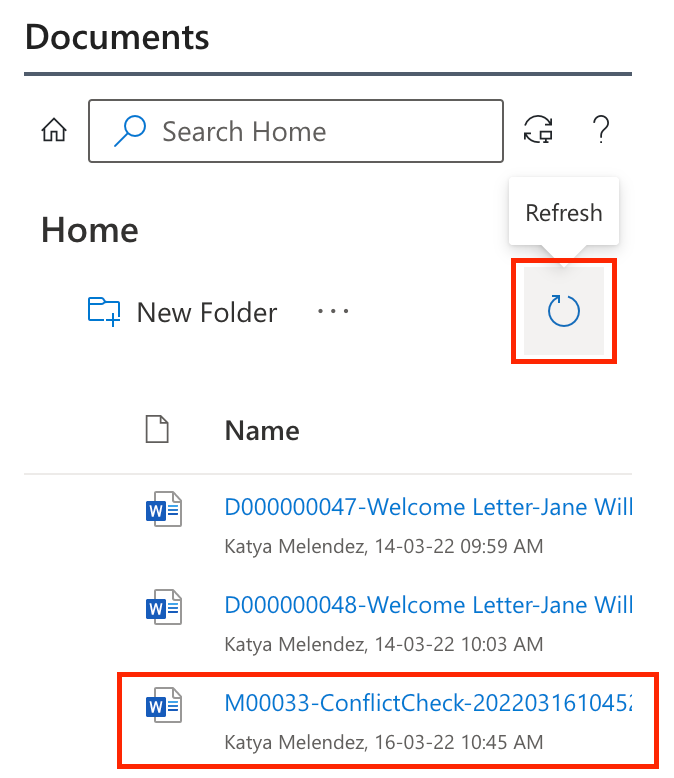
The Conflict Check report will be listed under your Documents section on the matter card.
To execute a document task
-
Click the three vertical dots next to the task Type and then select Execute Task.

-
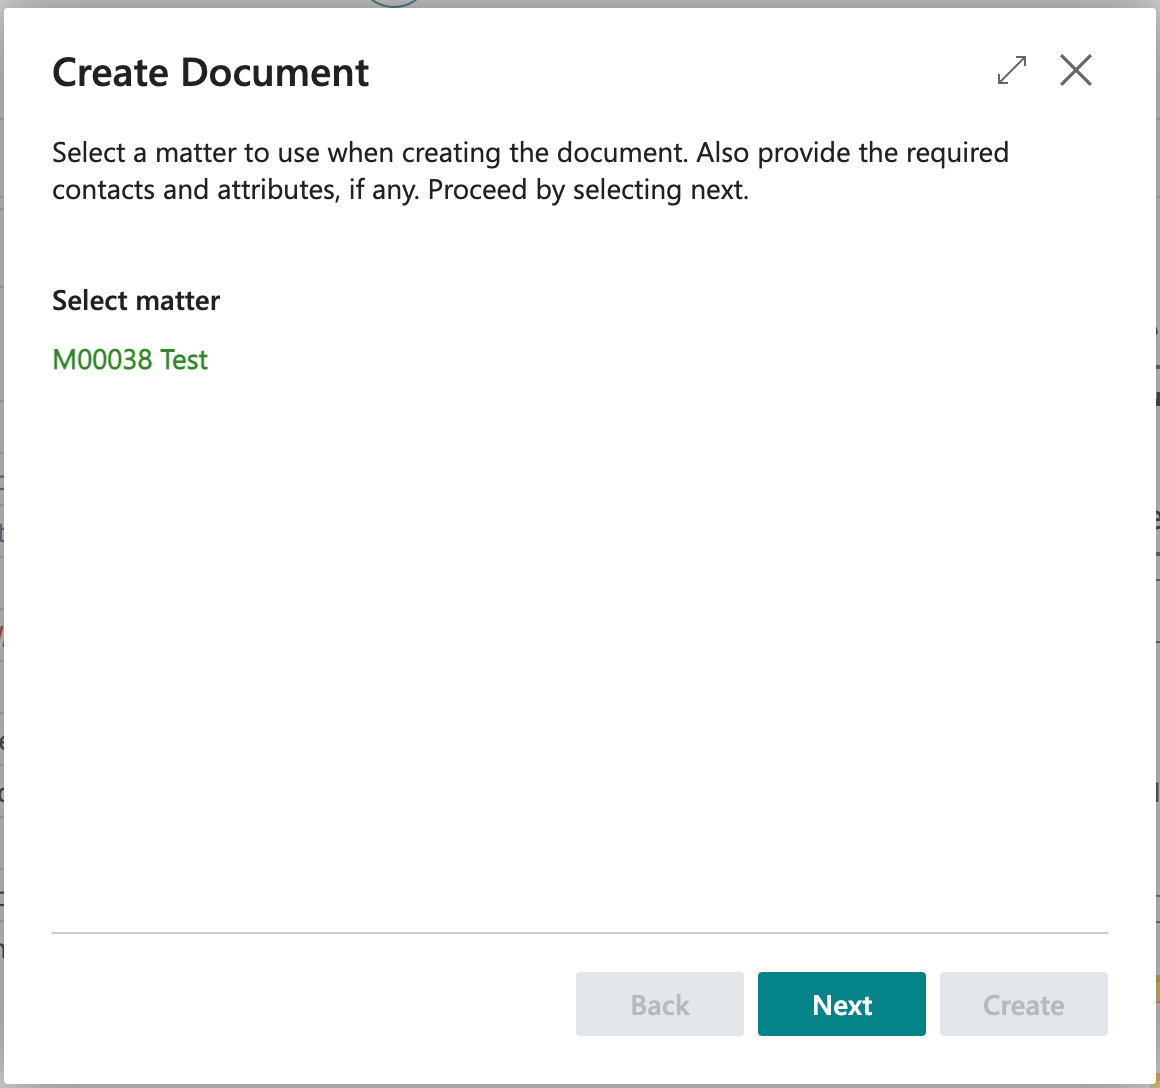
Create Document window will appear. Work through prompts.
-
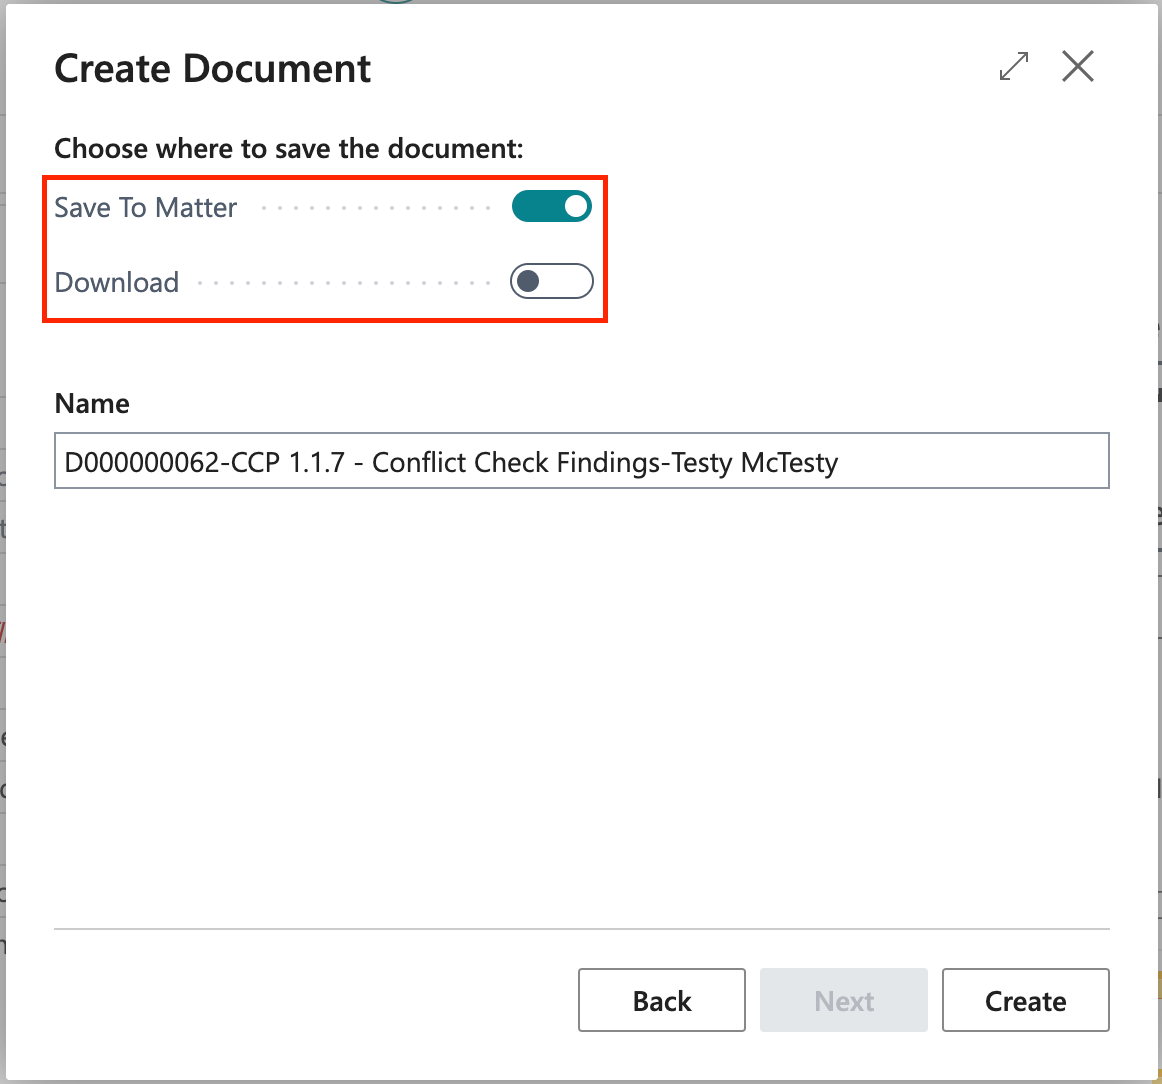
Choose where to save the document. You can either Save to Matter or Download. Then select Create.
-
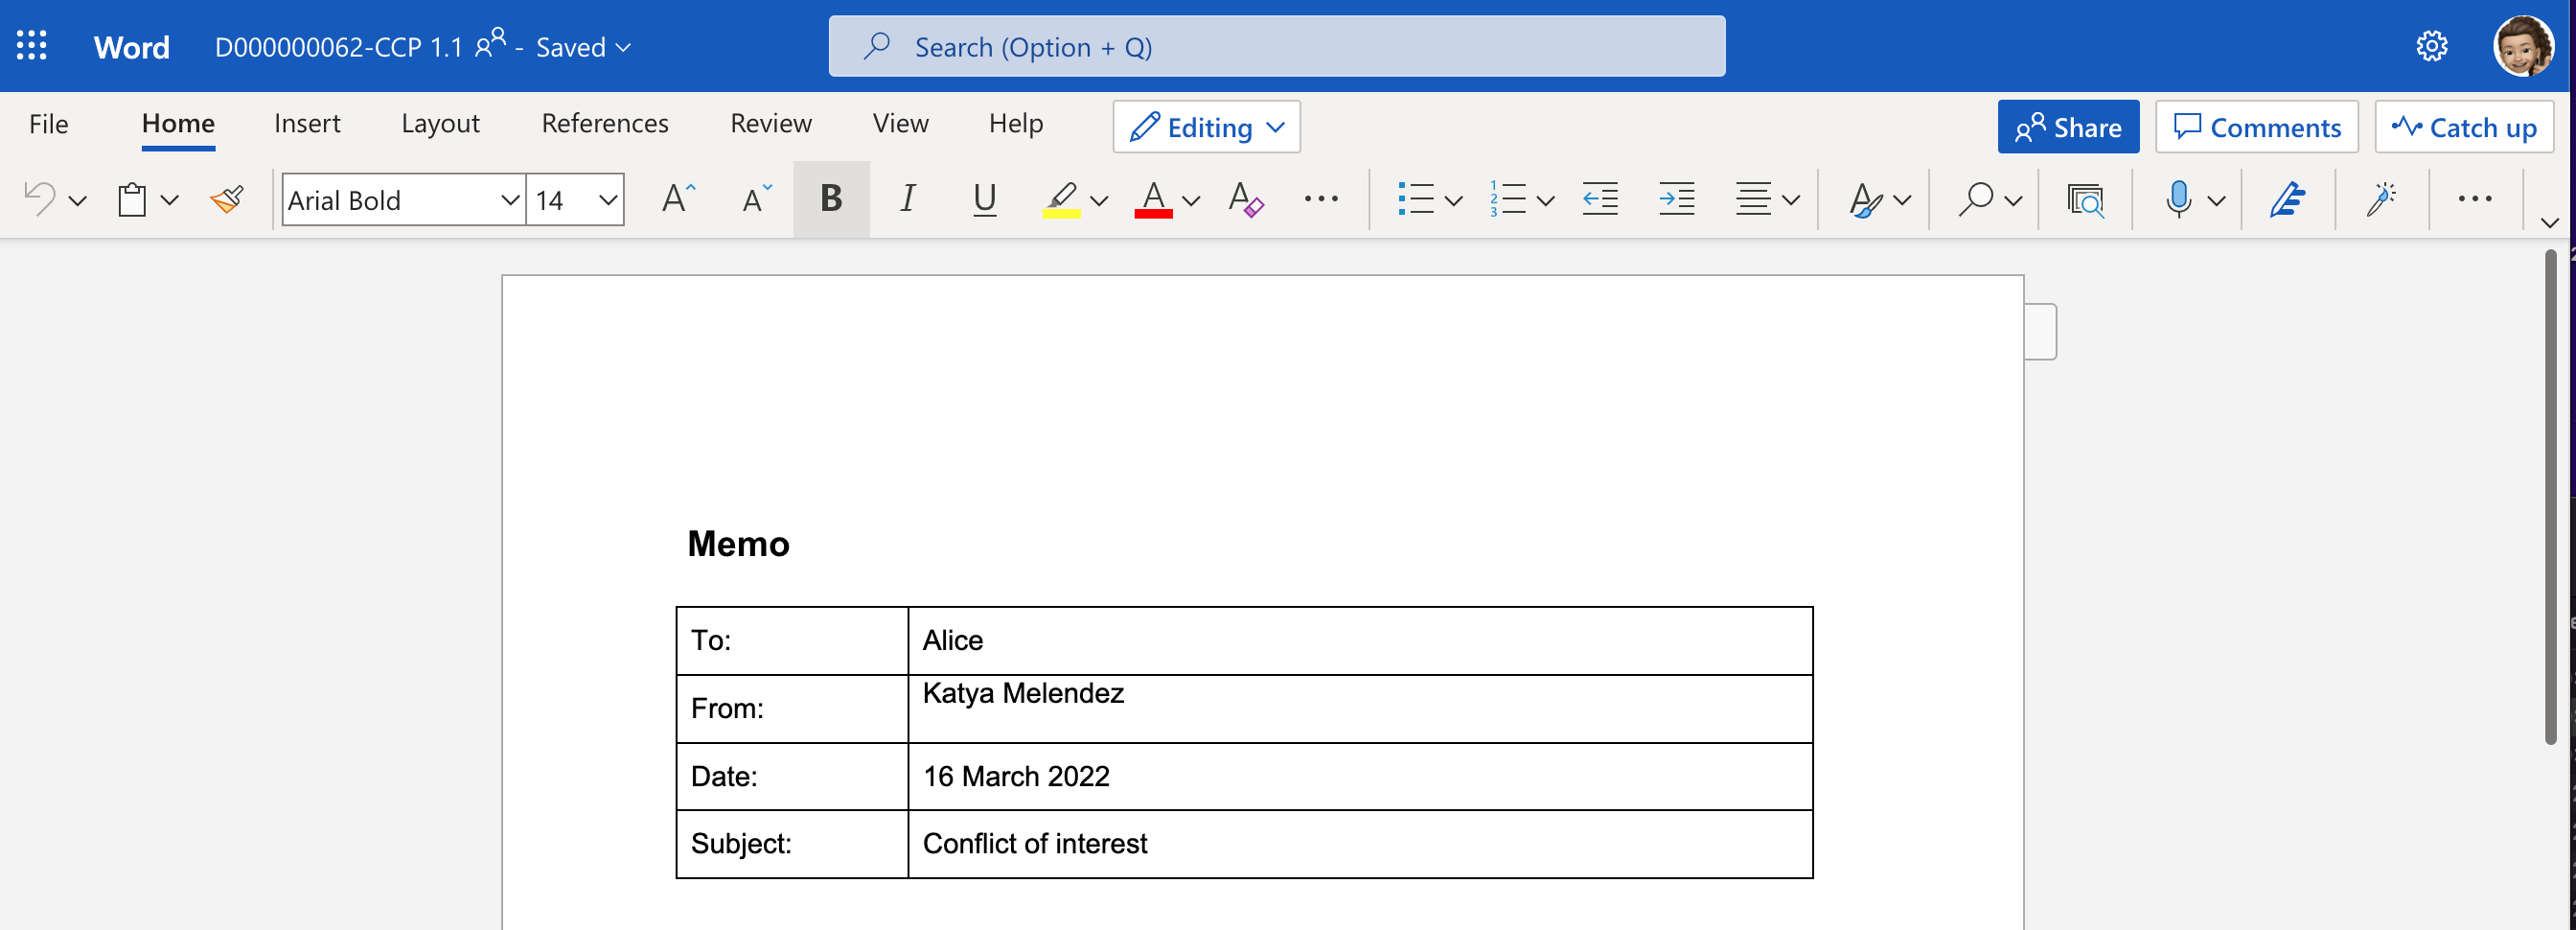
Word will open and display your document.
-
The document will be listed under your Documents section on the matter card.
