Quick Start (Walkthrough)
This quick start walkthrough will guide you through a basic legal business process that demonstrates how a matter is handled in MatterX. This walkthrough refers to the demo data (templates, departments and areas of law for example) included with a trial environment however you can replicate this in your own environment by simply substituting your own data when needed.
Change to the MatterX Lawyer Role
- In the top right corner of the home page click the Setings icon to open the My Settings window.

- In the My Settings window open the Role options by clicking the [...].

- In the Available Roles window select MatterX Lawyer and click OK.

- Click OK to close the settings window and to complete the change to the MatterX Lawyer Role.
Create a Client
- In the upper right section of your homepage are the quick Actions. Click the +Client action to launch a new Client Card.

- On the Client Card enter the name of the client. Entering a name is the minimal amount of information required to create a Client.

- You can click the back button to complete the creation process however in the next step we will continue to create a Matter directly from the Client Card.
Create a Matter from the Client Card
- In the navigation bar at the top of the Client Card click New > New Matter to open the Matter Templates window.

- Select Blank Matter Template and click OK.
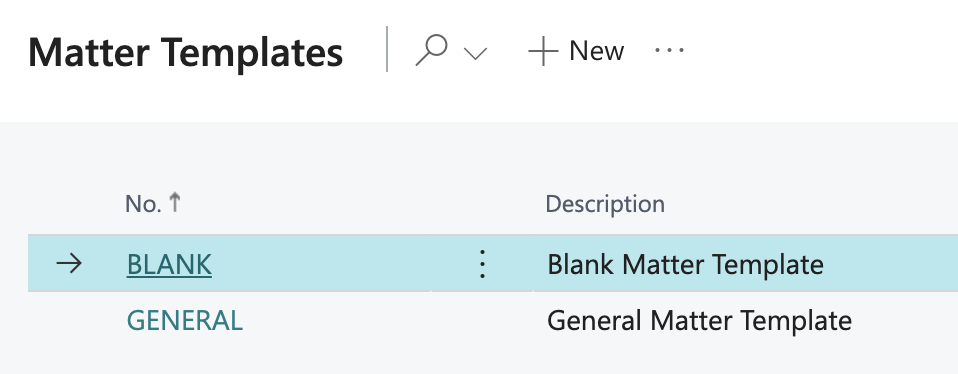
- A new Matter Card will open and because we created the Matter from the Client Page the Client will already be filled out. Enter a description for the Matter.

- Select any Department for this walkthrough.
- Select any Area of Law for this walkthrough.
- Ensure the Status is set to "Active"
- In the Responsibilities section set yourself as Manager, Assigned, and Assisting.

- The Matter is now created and in the next step we will continue on with creating an Activity for yourself to complete.
Create a Task
In this section you will create a Task with a due date and complete it.
- On the Matter Card page scroll down until you find the Tasks section. If you used the Blank Matter Template in the previous step you will already have a Stage called "General" in the list.

- To create a new Task, on a new line select Activity in the Type column.
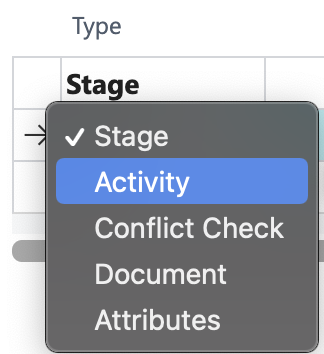
- Enter "My activity" as the description. Set a due date and select yourself as the Responsible Name.

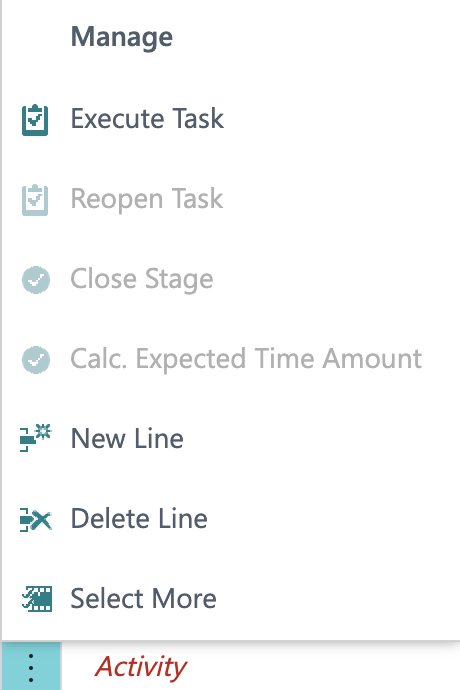
- To complete the task, click the three vertical dots next to the Task name and click Execute Task.
Create a Time Entry
- Click the New Time Entry button on the Matter Card navigation bar.

- Fill out the Time Entry page.
- Posting Date - leave the default date
- Matter - Should already be selected
- Stage - If the Stage is empty select "General" from the options
- Work Type - Select "VIDEO-CONF Attend video conference"
- Unit of Measure - Leave the default of MIN (Minutes)
- Quantity - Enter "60"

- Click OK to complete the time entry.
- Click OK to confirmation message.
Add a Disbursement (via a Purchase Invoice)
In this step you will add a disbursement to the matter that will be charged to the client. A disbursement is a product or service that has been provided by a 3rd party vendor (a medical expert or consultant for example) and added to the client's costs on the matter.
- Click the New Purchase Invoice button on the Matter Card navigation bar.

- Click the [...] and select a vendor from the list.

- Enter a Vendor Invoice No of "12345".

- Fill out the details of the Purchase Invoice by adding a new line.
- Type - Resource
- No. - Select "Consultation fee"
- Matter No. - Select the Matter if it is empty
- Stage Name - Select "General" if it is empty

- From the navigation bar on the Purchase Invoice screen, click Posting > Post

- Click Yes on the confirmation dialog.
- Click No if prompted to open the Posted Purchase Invoice.
Create an invoice
In this step you will prepare a Sales Invoice for the client that will include both the Time Entry and Disbursement in the previous steps. Sales Invoices can be prepared in bulk, allowing a user to generate invoices for an entire month and a specific client, however in this demonstration we will select a specific matter.
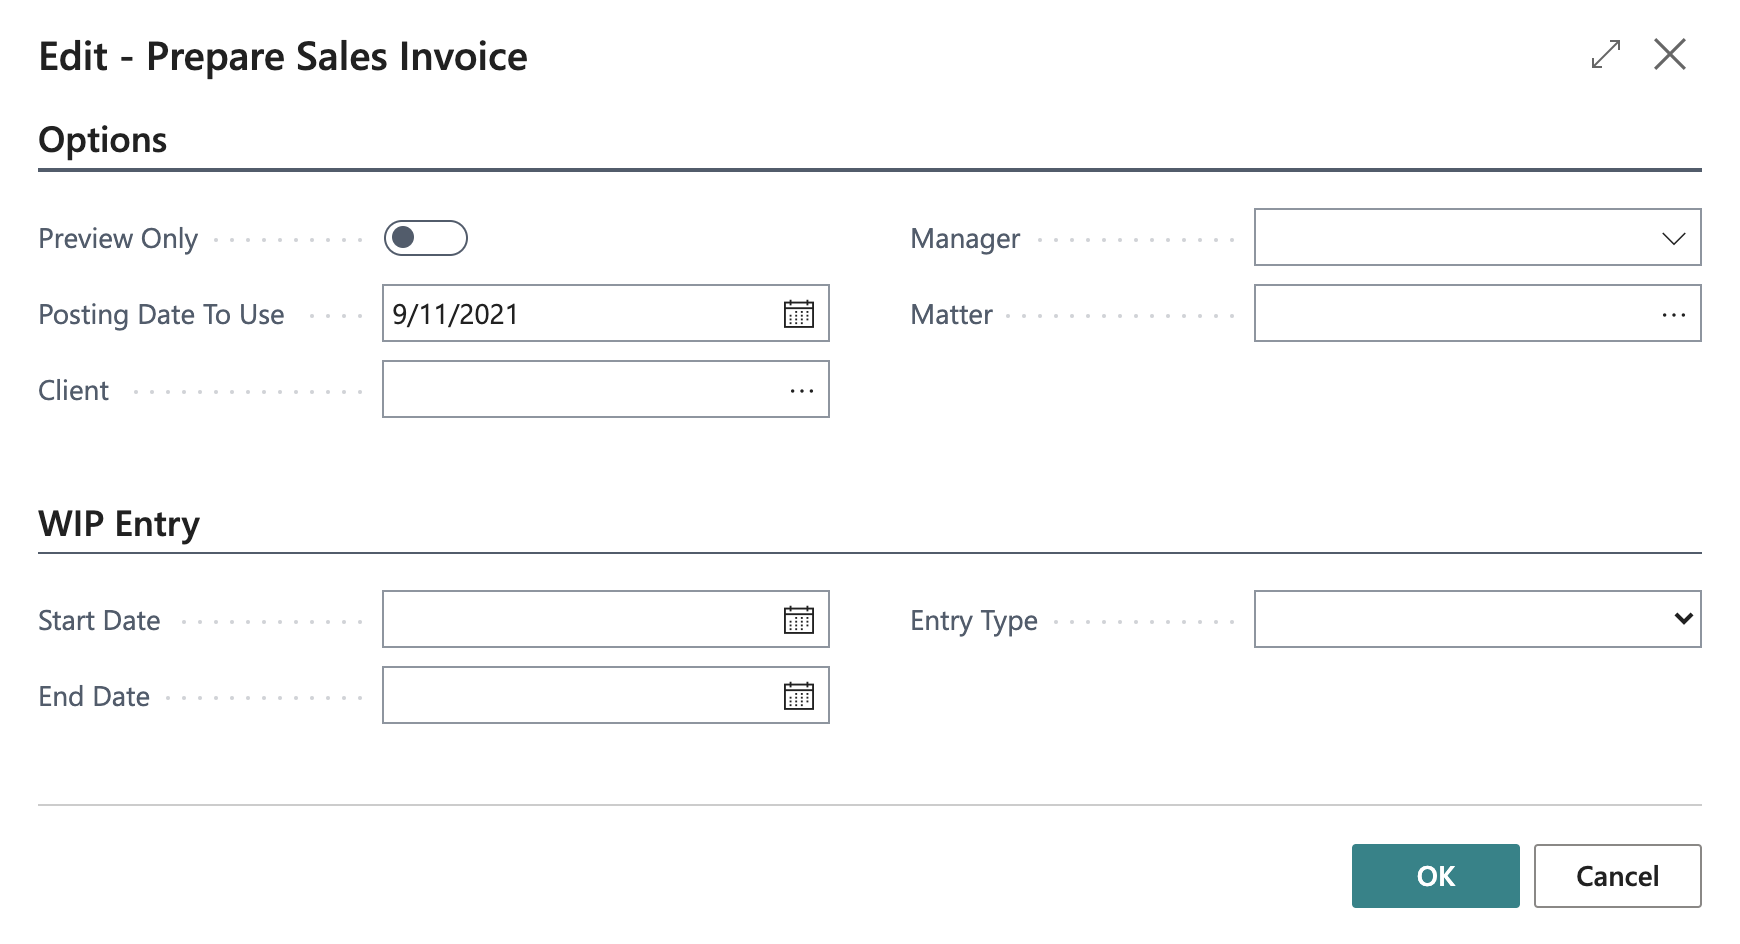
- In the upper right section of your homepage are the quick Actions. Click the +Prepare Sales Invoice action.

- In the Prepare Sales Invoice screen select only the Matter and click OK
- Click Yes to the confirmation.
- When processing is complete the unposted Sales Invoice will appear. The Sales Invoice still needs to be financially posted in the system for it to be finalised. In the navigation menu click Posting > Post.

- Click Yes to the confmation window.
- Click Yes to view the Posted Sales Invoice
Process a payment (Cash Receipt)
In this step you will enter a new payment for a specific invoice that you created in the previous step.

-
From the Posted Sales Invoice screen's navigation bar select Process > New Cash Receipt
-
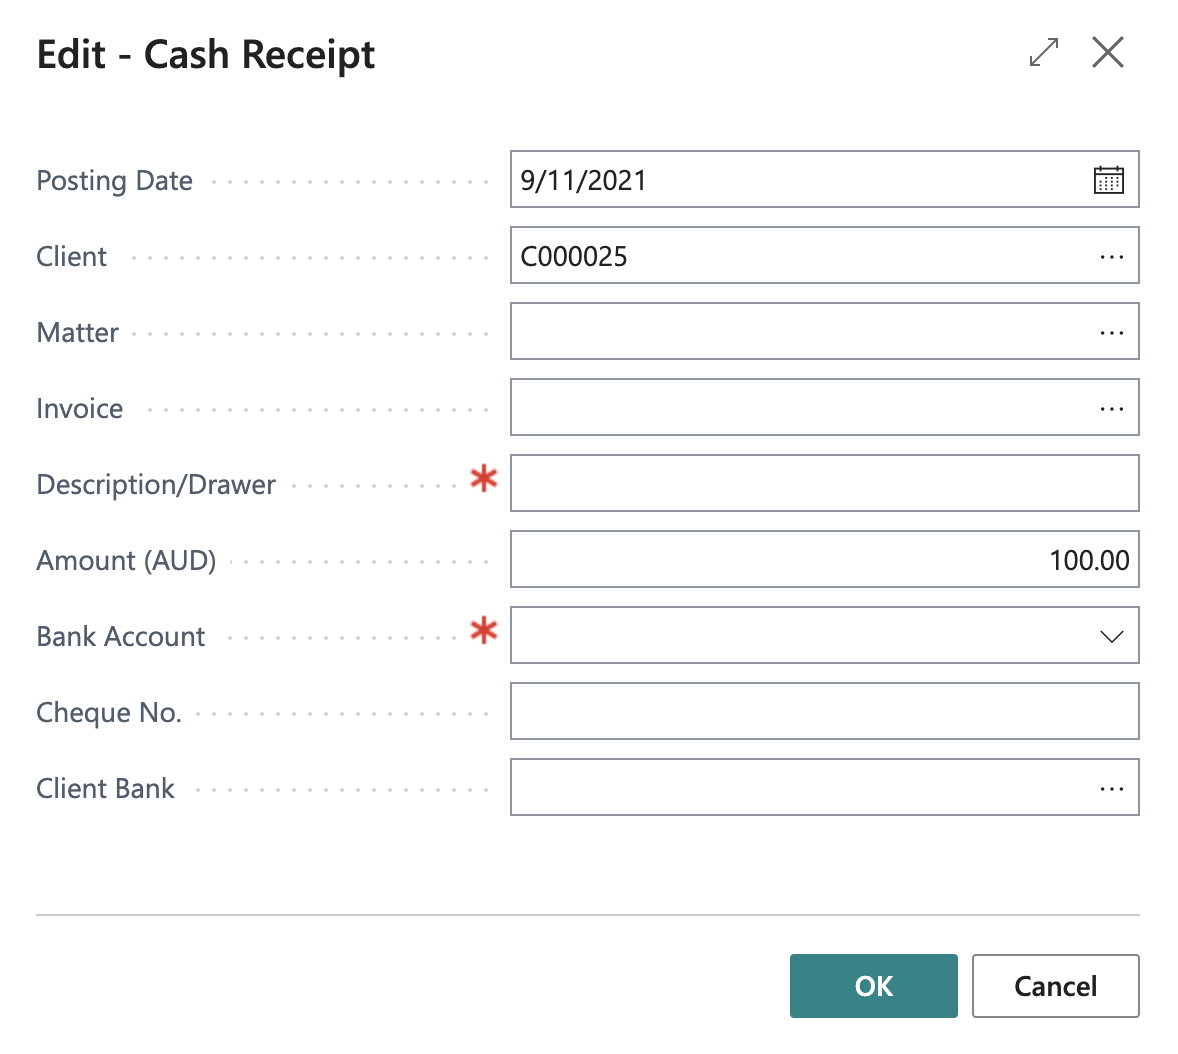
Fill out the Cash Receipt entry
- Posting Date - leave the default
- Client - select the Client if it is empty
- Matter - select the Matter if it is empty
- Invoice - select the Invoice if it is empty
- Description/Drawer - enter a description
- Amount - Enter the amount if it is empty. If the payment was created from a Posted Sales Invoice, the total invoice amount should be filled out automatically
- Bank Account - select a Bank Account
-
Click yes to Post.
-
Click OK to the confimration.
-
Press the back button until you close all open pages and are at the home page.
