Recommended Setup
Department & Area of Law
Department and Area of Law are used to categorise your matters and to track financial transactions. They are both Financial Dimensions and have a parent child heirarchical relationship where Departments are at the top and Area of Law are within each Department. For example:
- Family Law
- Child Support
- Divorce
- Property Settlement
- Commercial Litigation
- Contract Law
- Corporations Law
- Insolvency
If configuring your system for the first time we recommend you delete all dimension values and create an appropriate heirarchy for your business.
Navigating to the Dimensions page
- Choose the
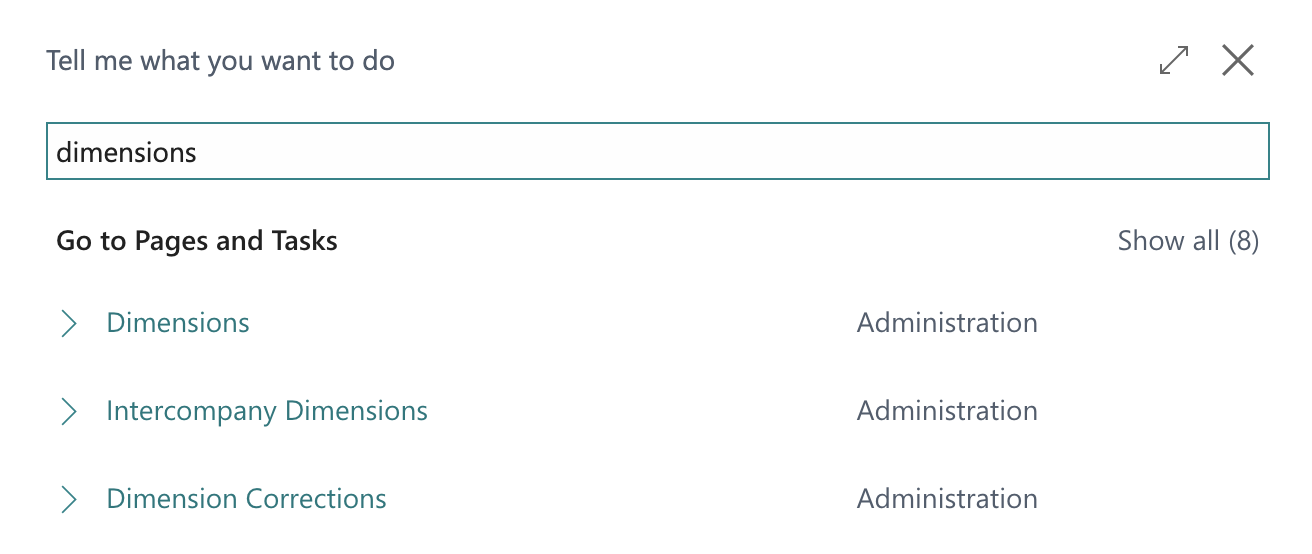
 icon to search for "dimensions". Click Dimensions in the list to open the Dimensions window.

Adding a new Department
- In the dimensions window, select the department line by clicking any field on that line, then in the navigation bar click Dimension > Dimension Values

- Click +New from the navigation bar to add a new line.

- Fill out the details of the new department line:
- Code - Enter a short code for the dimension. We recommend using capital letters wih no spaces.
- Name - Enter the name of the department.
- Dimension Value Type - Set to "Standard".
Removing a Department
- In the dimensions window, select the department line by clicking any field on that line, then in the navigation bar click Dimension > Dimension Values

- Select the department you wish the remove by clicking in any column on that line. Click the button next to the code and then select Delete to remove the department.

Adding a new Area of Law
- In the dimensions window, select the area of law line by clicking any field on that line, then in the navigation bar click Dimension > Dimension Values

- Click +New from the navigation bar to add a new line.

- Fill out the details of the new area of law line. Note that you will need to select a parent department for each area of law.
- Code - Enter a short code for the dimension. We recommend using capital letters wih no spaces.
- Name - Enter the name of the department.
- Shortcut Dimension 1 Code Filter: Select the parent department for this area of law.
- Dimension Value Type - Set to "Standard".
Removing an Area of Law
- In the dimensions window, select the area of law line by clicking any field on that line, then in the navigation bar click Dimension > Dimension Values

- Select the area of law you wish the remove by clicking in any column on that line. Click the button next to the code and then select Delete to remove the department.

Resource Groups & Rates
Your people that create time entries and record time on matters are set up as resources of type 'people'. These resources are also assigned to a resource group. It is the resource group that holds the hourly charge out rate for the resources. A resource can be assigned to only one Resource Group. A resource group can contain many resources.
Rates are configured per Resource Group and for a given date range that is specified by a start and end date. You may enter a single rate with an end date far into the future if you do not have any historical or future rate changes planned.
Navigating to the Resource Group page
- Choose the
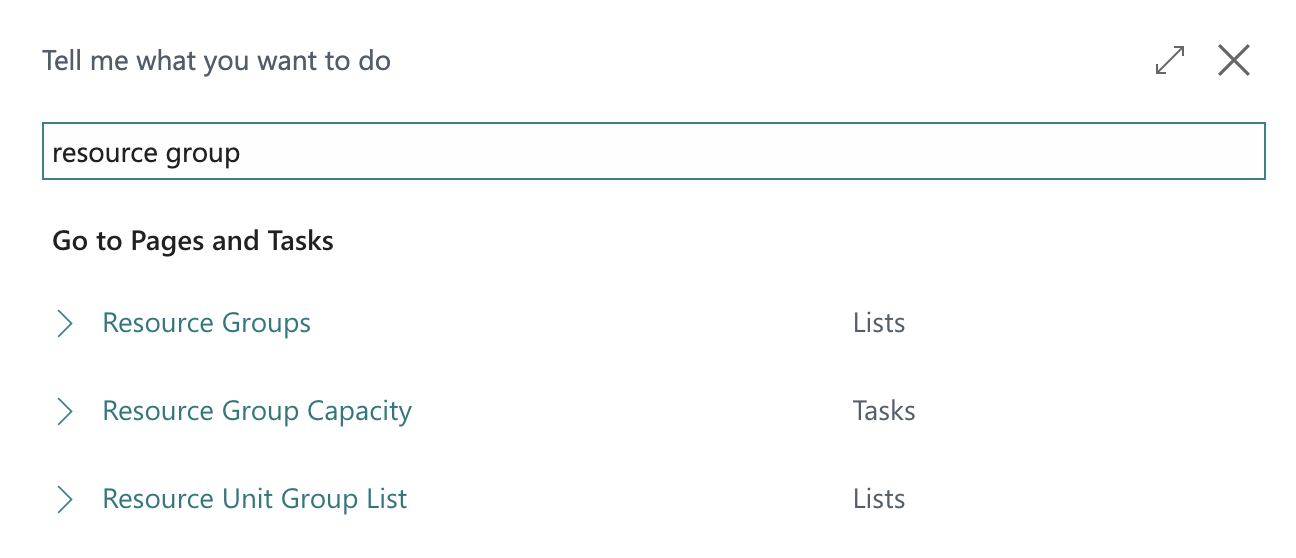
 icon to search for "resource group". Click Resource Groups in the list to open the Resource Groups window.

Adding a new Resource Group
- In the navigation menu click New > New to create a new line.

- Fill out the new line:
- No. - Enter a code for the new resource group. We recommend using capital letters wih no spaces.
- Name - Enter a name for the resource group.
Removing a Resource Group
- In the Resource Group page, find the Resource Group you want to delete.
- Click the button next to the code and click Delete.

Adding Rates for a Resource Group
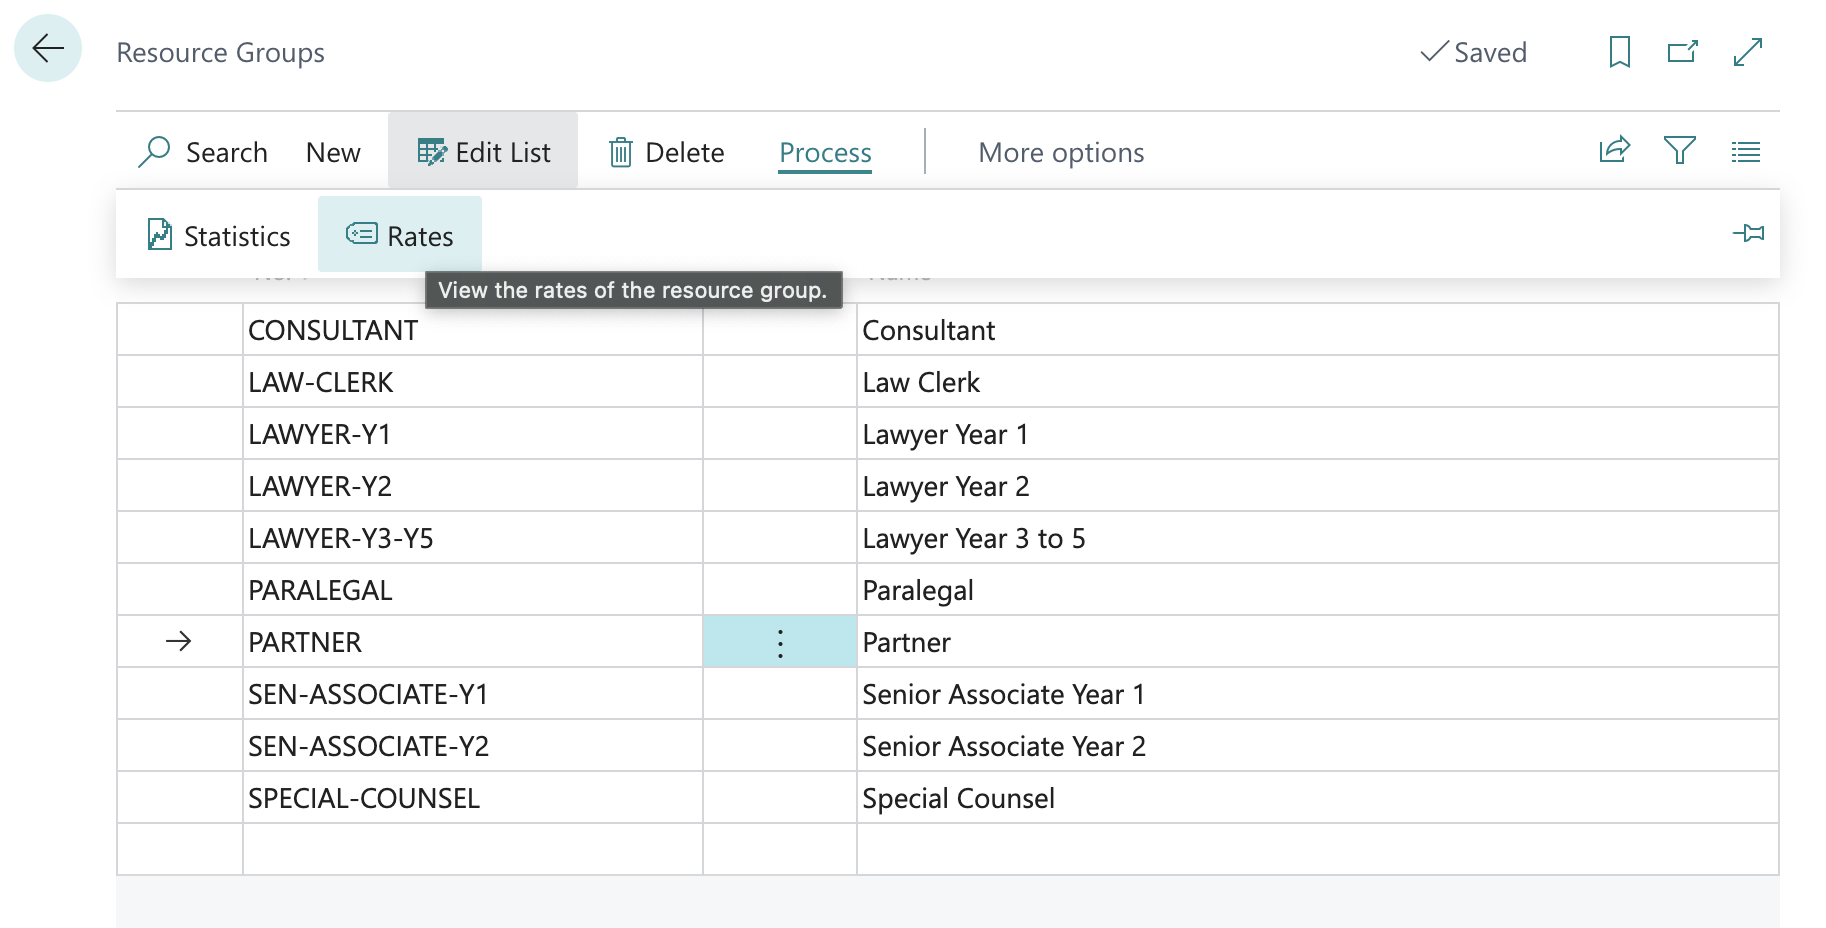
- Select a resource group by clicking any column on the line, then click Process > Rates.

- Click +New to add a new line and complete the fields:
- Type - Set to "RESOURCE GROUP"
- No. - Set to the name of the Resource Group
- Rate - Set the hourly rate amount
- Start Date - Set the effective start date for the rate
- End Date - Set the end date for the rate

- Note that you will not be able to complete a transaction for a Resource and Resource Group if there is no active rate for that date range.
Removing Rates for a Resource Group
- Select a resource group by clicking any column on the line, then click Process > Rates.

- Click
User Groups
Include Group Owners